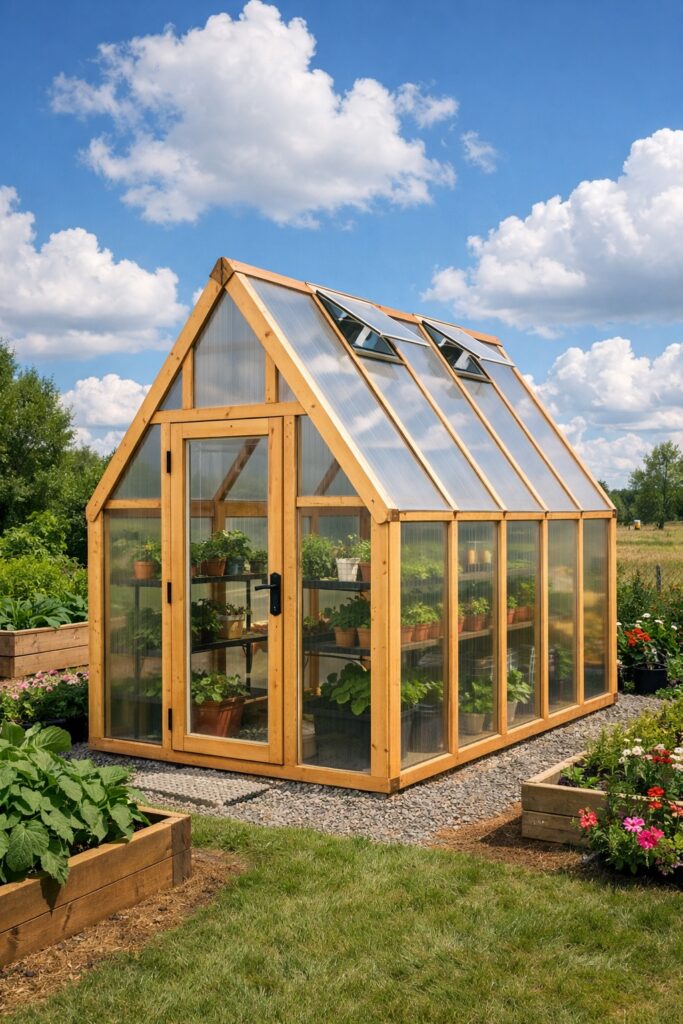
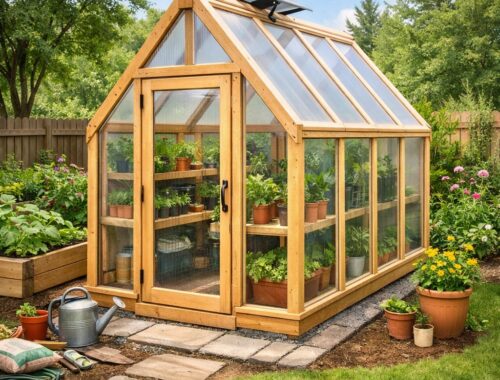
Building an 8 X 10 Greenhouse
Building an 8×10 Greenhouse – Part 2: Planning, Materials, Tools & Smart Tips
If Part 1 of this series was all about dreaming and designing, Part 2 is where building an 8 x 10 greenhouse truly starts to take shape. Whether you’re growing vegetables year‑round, starting seedlings early, or creating a cozy plant sanctuary, proper planning and the right materials make all the difference.
This guide walks you through the planning steps, materials list, tools you’ll need, and pro tips for building a sturdy, long‑lasting 8×10 greenhouse.
🌱 1. Planning Your 8×10 Greenhouse
Just in cast you missed Part 1, let’s recap. Before you pick up a single tool, take time to plan. This is where you save money, avoid mistakes, and ensure your greenhouse thrives in every season.
Choose the Right Location
- Sunlight: Aim for 6–8 hours of direct sun. South‑facing exposure is ideal.
- Drainage: Avoid low spots where water pools.
- Wind protection: A fence, shed, or natural windbreak helps reduce stress on the structure.
- Accessibility: Close to water, power (if needed), and your garden beds.
Foundation Considerations
For building an 8×10 greenhouse, you have three solid options:
- Pressure‑treated lumber base (most common and budget‑friendly)
- Concrete pavers (great for leveling and drainage)
- Full concrete slab (best for heavy use or shelving systems)
Ventilation & Temperature Control
Plan ahead for:
- Roof vents
- Side vents
- Automatic vent openers
- Shade cloth
- Small heater or fan (depending on climate)
🧱 2. Materials Needed for an 8×10 Greenhouse
Below is a comprehensive materials list you can adapt based on your design (hoop style, A‑frame, or panel‑frame).
Lumber & Structural Components
- 2×4 pressure‑treated lumber (for base, studs, rafters)
- 4×4 posts (optional for reinforced corners)
- 2×6 lumber (for roof beams or door framing)
- Exterior‑grade screws (1½”, 2½”, and 3″)
- Galvanized brackets, joist hangers, and corner braces
Covering Materials
Choose one:
- Polycarbonate panels (best insulation, long‑lasting)
- Greenhouse‑grade polyethylene film (budget‑friendly)
- Corrugated clear roofing panels (durable and bright)
Hardware & Accessories
- Door hinges and latch
- Vent hinges or automatic vent openers
- Weatherstripping
- Ground anchors or rebar stakes
- Silicone caulk (for sealing panel edges)
- Gravel for flooring (optional but recommended)
Foundation Materials
Depending on your choice:
- Pressure‑treated 2×6 or 4×4 lumber
- Concrete pavers
- Concrete mix (if pouring a slab)
- Landscape fabric
🔧 3. Tools You’ll Need
These are the essential tools for building an 8 x 10 greenhouse.
Measuring & Layout
- Tape measure
- Carpenter’s square
- Level
- Chalk line
Cutting Tools
- Circular saw or miter saw
- Utility knife
- Tin snips (for polycarbonate or corrugated panels)
Fastening Tools
- Power drill/driver
- Impact driver (optional but helpful)
- Screwdriver set
- Staple gun (for polyethylene film)
Foundation & Framing Tools
- Shovel
- Post‑hole digger (if anchoring posts)
- Rubber mallet
- Clamps (for holding panels in place)
Safety Gear
- Work gloves
- Safety glasses
- Ear protection
- Dust mask
🌿 4. Tips for a Strong, Long‑Lasting Greenhouse
These small details make a big difference in durability and performance.
Tip 1: Build the Base Perfectly Level
A level foundation prevents:
- Warped framing
- Misaligned doors
- Stress on panels
Take your time here — it pays off.
Tip 2: Pre‑Drill All Holes in Polycarbonate
This prevents cracking and extends the life of your panels.
Tip 3: Add Extra Bracing in Windy Areas
Diagonal bracing on the inside corners dramatically increases stability.
Tip 4: Seal All Gaps
Use silicone caulk around panel edges to keep out drafts, pests, and moisture.
Tip 5: Install Automatic Vent Openers
They regulate temperature without electricity — a game‑changer for plant health.
Tip 6: Consider a Gravel Floor when building an 8 x 10 Greenhouse
Benefits:
- Excellent drainage
- Clean working surface
- Prevents weeds when paired with landscape fabric
🌼 5. Wrapping Up Part 2
With your planning complete and materials gathered, you’re ready for the exciting part — framing and assembly, which we’ll cover in Part 3. This is where your greenhouse truly comes to life.