How To Build a Small Backyard Greenhouse
Creating your own small greenhouse is a great DIY project. Whether you want to extend your growing season, protect delicate seedlings, or simply enjoy the beauty of a warm, plant‑filled space. a greenhouse either large or small can transform your backyard. As builders we have people ask us how to build a small backyard greenhouse
The best part: you don’t need advanced carpentry skills or expensive materials. With thoughtful planning and a few key supplies—many of which are available at Home Depot—you can build a sturdy, attractive greenhouse in a single weekend.
🌱 Step 1: Plan Your Greenhouse Layout
Before you pick up a hammer, take a moment to plan. A little forethought saves time, money, and frustration.
Choose the Right Location
Look for:
- 6–8 hours of sunlight daily
- Good drainage (avoid low, soggy spots)
- Protection from strong winds
- Easy access to water
- Somewhat level
Decide on Size
For beginners, a 6′ x 8′ or 8′ x 10′ greenhouse is ideal—large enough to be useful, small enough to build in a weekend.
Pick a Style
Popular small‑greenhouse designs include:
- Hoop house (PVC or metal conduit + plastic sheeting)
- A‑frame (simple lumber + polycarbonate panels)
- Lean‑to (built against an existing wall)
For this guide, we’ll focus on a simple A‑frame greenhouse, which is sturdy, attractive, and beginner‑friendly.
🔨 Step 2: Gather Your Materials
Here’s a materials list for a small A‑frame greenhouse. These are all common items. Next time we will talk about a more detailed list with a plan.
Lumber
- 2×4 pressure‑treated boards (for framing)
- 4×4 posts (optional for anchoring)
Covering Material
- Clear polycarbonate panels (durable, UV‑resistant, lasts year over year)
or - 6‑mil clear greenhouse plastic (budget‑friendly starts to add up when needing replacement )
Hardware
- Exterior wood screws
- Galvanized nails
- Door hinges + latch
- Corner brackets (optional for extra stability)
Foundation Options
- Concrete pavers
- Gravel
- Pressure‑treated base frame
Tools
- Circular saw or hand saw
- Drill + bits
- Measuring tape
- Level
- Staple gun (if using plastic sheeting)
🧱 Step 3: Build the Foundation
A solid base keeps your greenhouse level and long‑lasting.
Option A: Gravel Base
- Mark your greenhouse footprint.
- Dig down 3–4 inches.
- Fill with gravel and level it.
Option B: Wooden Base Frame
- Build a rectangle using 2×4 or 4×4 lumber.
- Square the corners.
- Anchor with rebar stakes or concrete blocks.
🪚 Step 4: Build the A‑Frame Structure
1. Construct the Side Walls
- Build three identical rectangular frames.
- build one frame with a door
- Add vertical supports every 2 feet.
2. Create the Roof Trusses
- Cut 2x4s at 45° angles to form the “A” shape. (panels about the same size as walls)
- Secure with screws and metal brackets.
3. Assemble the Frame
- Stand the walls upright.
- Attach roof trusses across the top.
- Add a ridge beam for stability. (each side of the roof panel can rest against and attach to)
🌞 Step 5: Install the Covering
If using polycarbonate panels:
- Cut panels to size.
- Pre‑drill holes to prevent cracking.
- Attach with screws and rubber washers. (to prevent leaking)
If using greenhouse plastic:
- Stretch plastic tightly over the frame.
- Staple securely. Use plastic buttons so the staples don’t just rip through
- Add furring strips to protect the plastic and keep it taut.
🚪 Step 6: Add the Door and Ventilation
- Build a simple wooden door frame .
- Cover it with plastic or polycarbonate.
- Install hinges and a latch.
- Add vents or windows to prevent overheating.
🌿 Step 7: Set Up the Interior
Make your greenhouse functional and beautiful:
- Add shelving for seedlings
- Lay pavers or gravel for flooring
- Install hooks for hanging planters
- Add a small fan for airflow
- Use a thermometer to monitor temperature
Building a small greenhouse is a project that pays you back every season—with earlier harvests, healthier plants, and a peaceful space to enjoy. Whatever you produce, whether it be flowers, herbs or garden starts, a greenhouse can improve your life. We built a “decorative” greenhouse with a saloon front. It looks great in the yard and it’s useful to get the garden going early to save money at the grocery store.
While you are finishing your greenhouse, you can start planning your next garden project. In case you have not built your Raised Garden Beds, read about it here
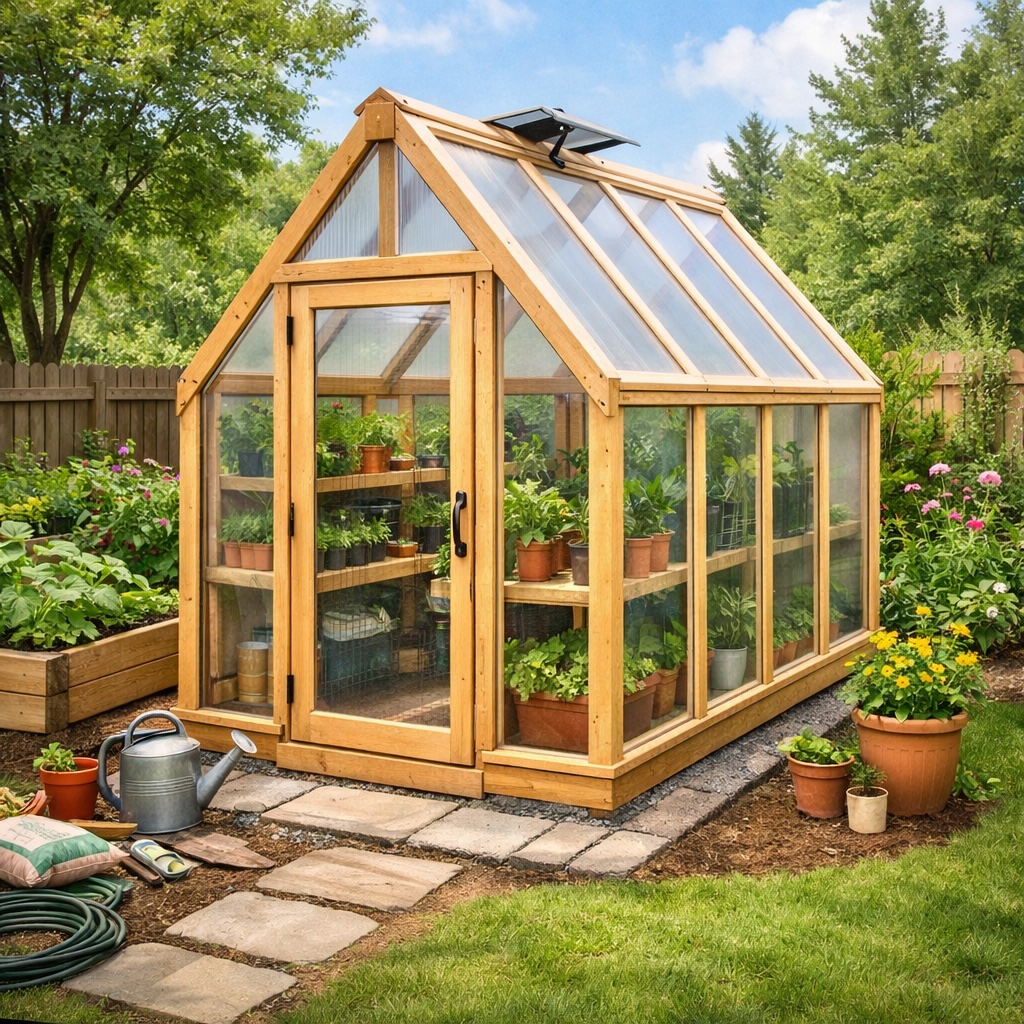
Read along next time and I will supply a materials list and some tips for planning. The image below is AI generated, but you can get the idea of how it’s put together. Support every 2 feet, like shown etc. There is even a raised garden bed in the bottom left area.
For a larger greenhouse you would want to cement in posts or use blocks.