Framing and Assembly of a Greenhouse
Building an 8×10 Greenhouse – Part 3: Framing & Assembly of a Greenhouse
With your planning complete and materials gathered, it’s time to start framing and assembly of a greenhouse and turn that pile of lumber and panels into a something functional. This stage is all about precision, patience, and smart framing and assembly techniques that ensure your structure lasts for years.
🔩 1. Prepare Your Foundation
A solid base sets the tone for everything that follows.
- Check level again. Even a ¼‑inch slope can throw off door alignment, walls and roof.
- Anchor corners. Use galvanized brackets or rebar stakes to secure the frame. you can also use a solid material such as metal or plywood for the bottom 1/3 to form a sort of sheer panel.
- Lay landscape fabric and gravel. Keeps weeds down and improves drainage. Before laying the fabric down, make sure all weeds are gone or dead. I added Caseron to hinder plant growth.
🪚 2. Build the Frame
Start with the skeleton — the part that gives your greenhouse strength and shape.
Step 1: Assemble the Base
- Use 2×4 pressure‑treated lumber for the perimeter.
- Fasten corners with exterior‑grade screws and metal brackets.
- Double‑check diagonal measurements for squareness, square the corners.
Step 2: Add Vertical Studs
- Space studs every 24 inches along the sides. For framing and assembly of a greenhouse this size, you can build your walls on the ground and stand them up.
- Reinforce corners with 4×4 posts if you live in a windy area. You can sink these in the ground and add concrete or you can get a bracket. Cement will make everything solid. Make sure your hole is large enough, at least twice the size of the post.
- “Tack” your pieces together to make sure they work, then nail away.
Build 3 solid walls, then build one wall with a door frame. When they are all nailed, best to get some help, stand up the first two walls and secure them with a board across both walls at the top. Consider bracing to the ground if you need to. Make sure the walls are level. Repeat this on side two and three. note: my greenhouse has a back door. If you prefer, make two solid wall panels and two end panels with door frames. Ens
Step 3: Construct the Roof Frame
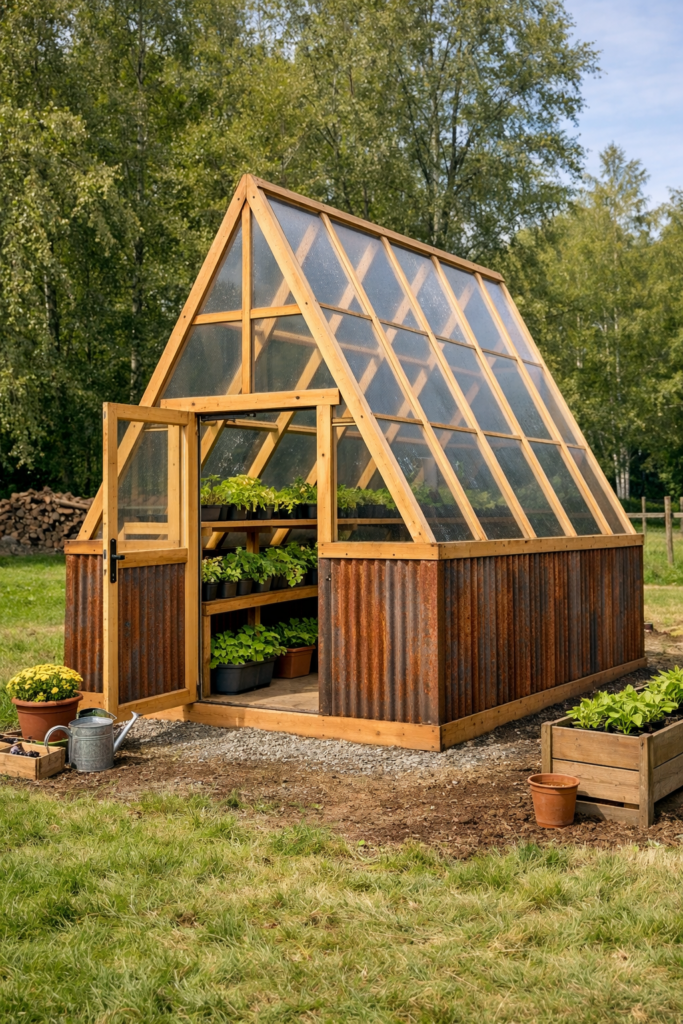
- Cut rafters to form the classic A‑frame peak. This is a 45 degree angle where they meet in the middle.
- Use joist hangers or gusset plates for secure joints. Nail the gusset plates to the wood joints on your rafters, to make it stronger. Place the hangers on the top plate (2 x 4 running around the top) and secure your rafters to them keep a guide board to nail to at the peak. Add spacer pieces between the rafters, nail.
- Leave openings for roof vents or automatic vent openers.
🪟 3. Install Panels or Film
This is where your greenhouse starts to shine — literally.
Polycarbonate Panels
- Pre‑drill holes to prevent cracking. make sure drill bit is sharp, don’t press too hard.
- Use weather‑resistant screws with rubber washers, they will cut down on breakage.
- Seal edges with silicone caulk.
Polyethylene Film
- Stretch tightly and staple to the frame.
- Reinforce edges with wooden battens. (over the top of the seam)
- Replace film every 3–5 years for best clarity.
🚪 4. Add Doors and Vents
- Hang the door using heavy‑duty hinges and a latch. You can make a door, or buy one in a frame. We bought a frame so the door could be locked. Shim the door until you have it even and level, then nail it in with large nails.
- Install roof or side vents for airflow. You can do this a couple ways. The easiest is to leave the bottom of the panel un-nailed so you can put a stick in it to allow air to pass through. You can also make vents or do the next suggestion.
- Consider automatic vent openers for temperature control.
🌞 5. Finishing Touches
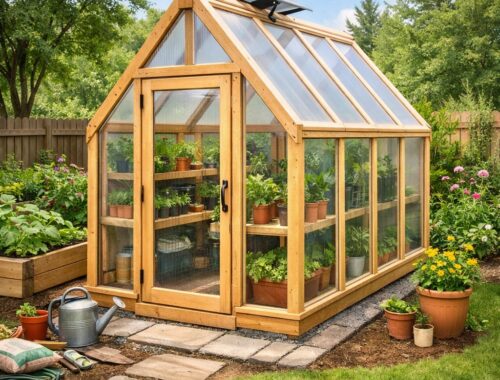
- Add shelving or potting benches inside. I will write about building a bench soon. So easy.
- Lay gravel or pavers for a clean floor. Or use both.
- Paint or stain the exterior wood for protection.
- Test ventilation and seal any gaps.
💡 Pro Tips
- Work in pairs. Framing and panel installation go faster with help.
- Label parts. Mark each piece before assembly to avoid confusion.
- Check alignment often. Small adjustments now prevent big headaches later.
- Use stainless hardware. It resists rust and extends lifespan. Cedar or pressure treated wood is best.
No matter what type of greenhouse you build for yourself, it will make gardening more convenient and enjoyable. With a protected space for starting and keeping plants your garden will be able to produce more flowers, and vegetables.
Just remember to have fun, go with the flow and enjoy the season.
You May Also Like

Baby Formula Shortage
How To Build a Small Backyard Greenhouse